Shopify inteqrasiyası
Aşağıdakı təlimatları izləyərək Seatext-i saytınıza quraşdırın. Quraşdırma prosesi təhlükəsizdir və AI aktivləşənə qədər passiv qalır, bu da saytınızın məzmununun bütövlüyünü təmin edir. Skripti quraşdırmadan əvvəl SEATEXT AI hesabına ehtiyacınız var. Hələ hesabınız yoxdursa, BURADA bir hesab yarada bilərsiniz.
Shopify inteqrasiyası
Addım‑addım inteqrasiya
Aşağıdakı bölmədə göstərilən SEATEXT AI‑nin Javascript kodunu kopyalayın.
SEATEXTCODEINTEGRATION
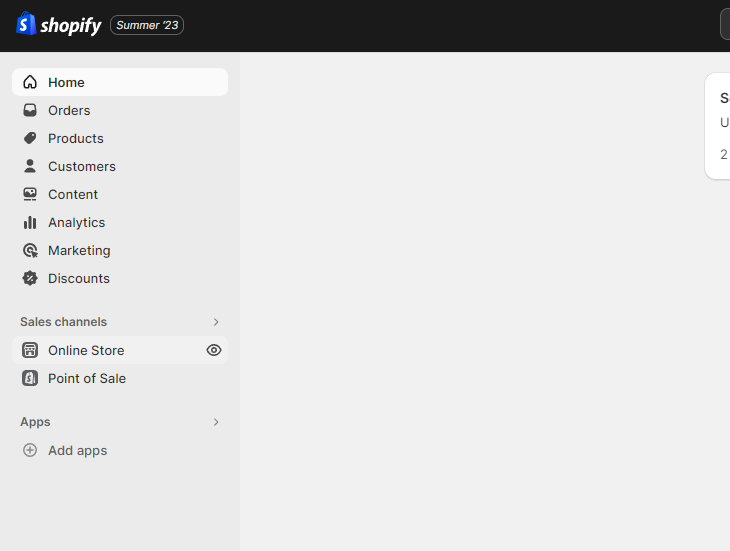
Shopify hesabınıza daxil olun və “Online Store” bölməsinə keçin. Oradan “Themes” (Temalar) seçin.
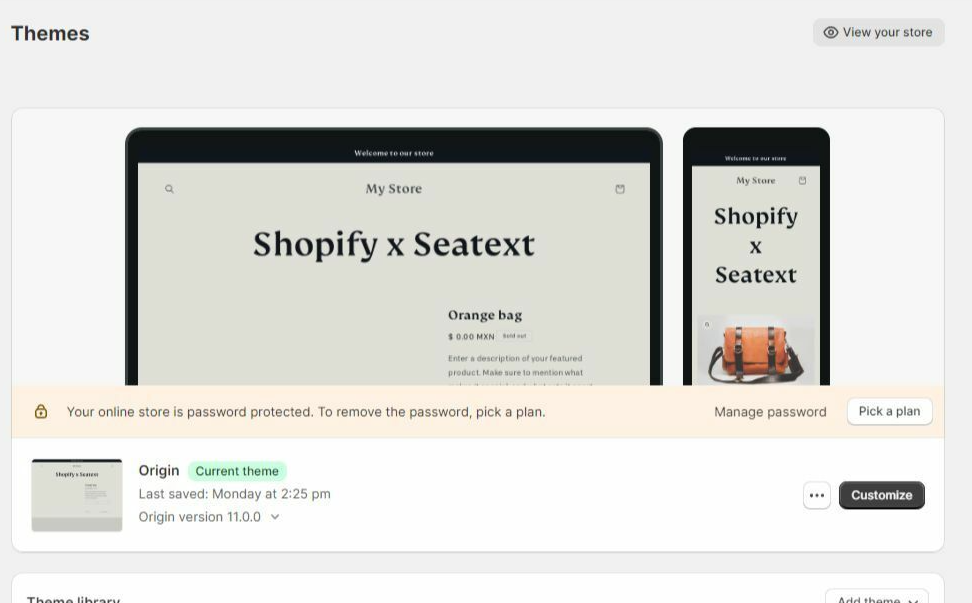
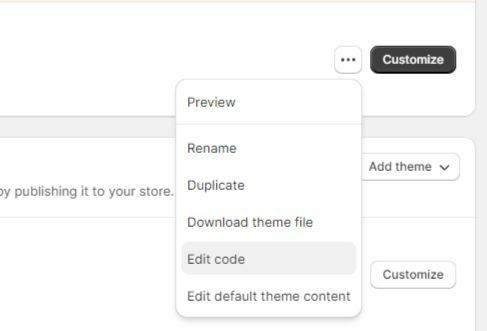
Temalar bölməsində tərcümə etmək istədiyiniz temanı tapın. İstədiyiniz temanın yanındakı üç nöqtəli ikona klikləyin və “Edit code” (Kodu redaktə et) seçin.
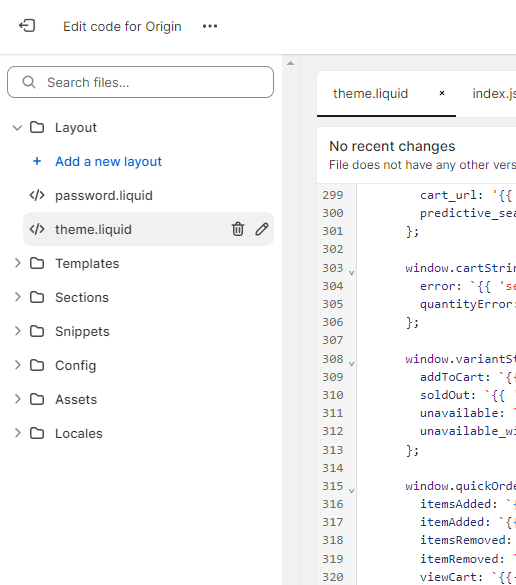
Kodu redaktə et səhifəsində ekranın sol tərəfində faylların siyahısı göstəriləcək. “Layout” (Tərtibat) qovluğuna keçin və “theme.liquid” adlı faylı tapın.
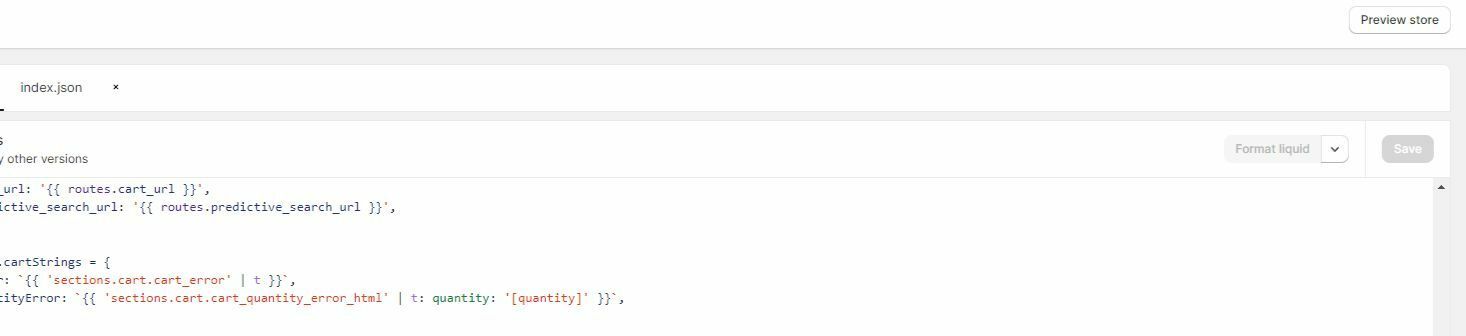
Within the theme.liquid file, scroll down to the bottom of the code. Here, you will find the closing </body> tag. Paste the JavaScript code snippet provided by SEATEXT AI directly above the closing </body> tag.


Kod parçacığını uğurla yapışdırdıqdan sonra dəyişikliklərinizi saxlamaq üçün “Save” (Saxla) düyməsinə klikləyin.
Çoxlu domenlər. SEATEXT AI‑ni bir neçə domen (məsələn, inkişaf və istehsal domenləri) üzərində istifadə etmək istəyirsinizsə, hər domen üçün ayrı hesab yaratmalısınız. Hər SEATEXT AI hesabı tək bir əsas URL‑ə bağlıdır. Təhlükəsizlik səbəbindən localhost kimi inkişaf URL‑ləri məhdudlaşdırılır. Bu hallarda etibarlı, real domen istifadə edin. Dinamik inkişaf domenləri düzgün işləməyə bilər, çünki SEATEXT AI trafikini hesabınıza etibarlı şəkildə bağlaya bilməyə bilər. Çoxlu veb‑saytlarda SEATEXT AI‑ni istifadə etmək üçün hər sayt üçün ayrıca hesab yaradın.
Vacib: Saytınızı bir neçə dəfə ziyarət edin və ya yeniləyin, səhifədə ən azı 40 saniyə qalın — bu, AI‑ni aktivləşdirib hesabınıza bağlayacaq.
Vacib: SEATEXT loqosunun yanında sayt adınızın bu səhifənin yuxarı hissəsində görünməsi üçün ən azı beş dəqiqə gözləyin. Bu, saytınızın qoşulduğunu və növbəti mərhələyə keçməyə hazır olduğunu göstərir. Əgər 10 dəqiqə keçdikdən sonra hələ də görünmürsə, dərhal dəstək komandamızla əlaqə saxlayın. Bu, quraşdırma zamanı problem yarandığını göstərə bilər və köməyimizə ehtiyacınız ola bilər.
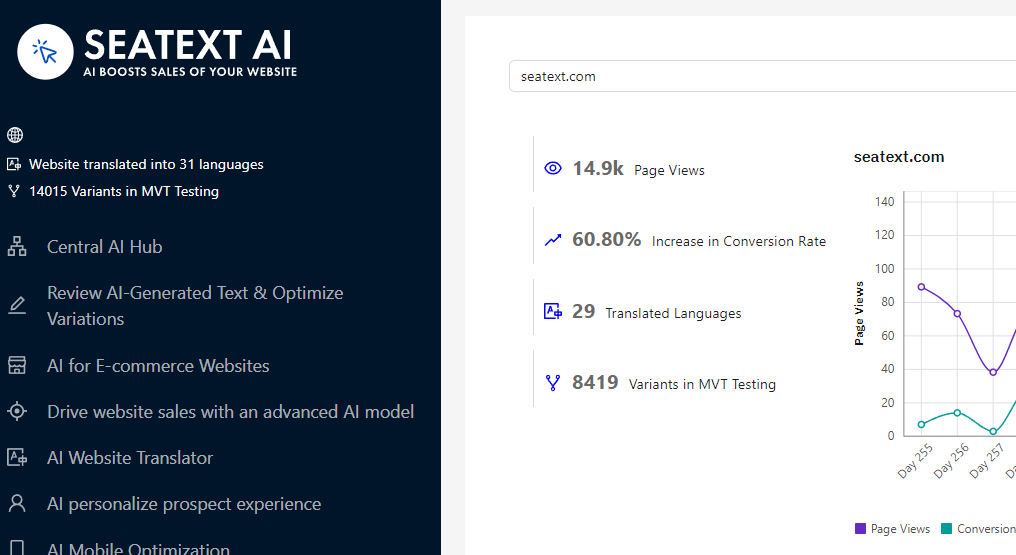
AI‑nın aktivləşdirilməsi. Lazımi AI‑ni seçdiyiniz səhifələrdə işə salmaq üçün Main AI Hub‑a keçin. AI parametrlərini tənzimləmək üçün “Configuration” bölməsinə klikləyin. İstəyə bağlı redaktə: SEATEXT AI test üçün ilkin avtomatik tərcümələr və variantlar təqdim edir. SEATEXT AI hesabınıza daxil olun, sol paneldə “Variants Edit” bölməsinə keçin və redaktə etmək istədiyiniz URL‑i və dili seçin. Burada variantlar üçün tərcümələri gözdən keçirə, yarada və ya əl ilə redaktə edə bilərsiniz.
Implement the seatextonly Tag in Your Product Descriptions To optimize your product descriptions effectively, please follow these steps: Step 1: Access Your Shopify Theme Code Log in to your Shopify admin and navigate to Online Store > Themes . Click on Actions > Edit Code for your active theme. Step 2: Locate the Product Template Identify the file that renders the product description (typically named product.liquid or located within product-template.liquid ). Step 3: Wrap the Product Description Find the product description output code, which usually appears as:
{{ product.description }}
Modify this code to wrap it in a <div> with the data-seatextonly attribute as follows:
<div data-seatextonly> {{ product.description | raw }} </div>
Step 4: Test Your Changes Save your changes and preview a product page to ensure the description is displayed correctly. Verify that the data-seatextonly attribute is present in the HTML source (you can inspect this using your browser’s developer tools). For additional details, please refer to our documentation here: https://seatext.com/documentation-ai-scope
