Zendesk integration
Zendesk-Integration
Step 1: copy the JavaScript code provided by SEATEXT AI, which can be found in the section below.
Schritt-für-Schritt-Integration
1
Zendesk-Integration
Step 1: copy the JavaScript code provided by SEATEXT AI, which can be found in the section below.
Schritt-für-Schritt-Integration
1
SEATEXTCODEINTEGRATION
Schritt 2: Fügen Sie den JavaScript-Code von Seatext auf Ihrer Website ein
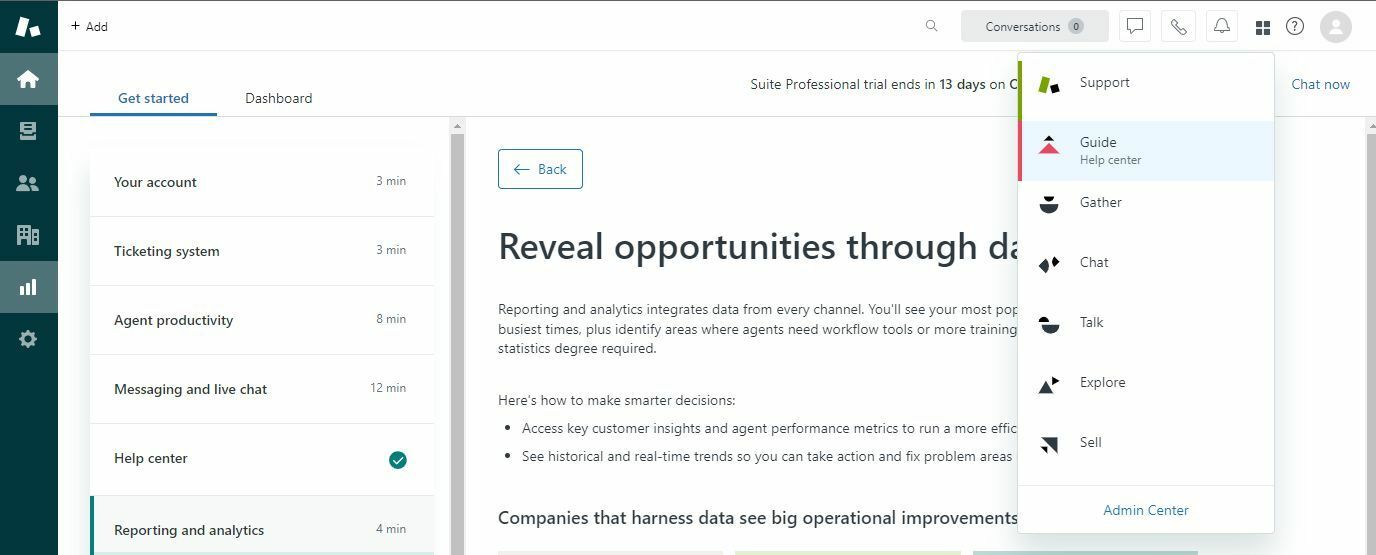
Access the "Guide" section of your Zendesk dashboard. In your Zendesk dashboard, locate and click on the four small square icon, then select "Guide" from the options provided.
Sie haben SEATEXT AI nun erfolgreich mithilfe von JavaScript auf Ihrer Website installiert.
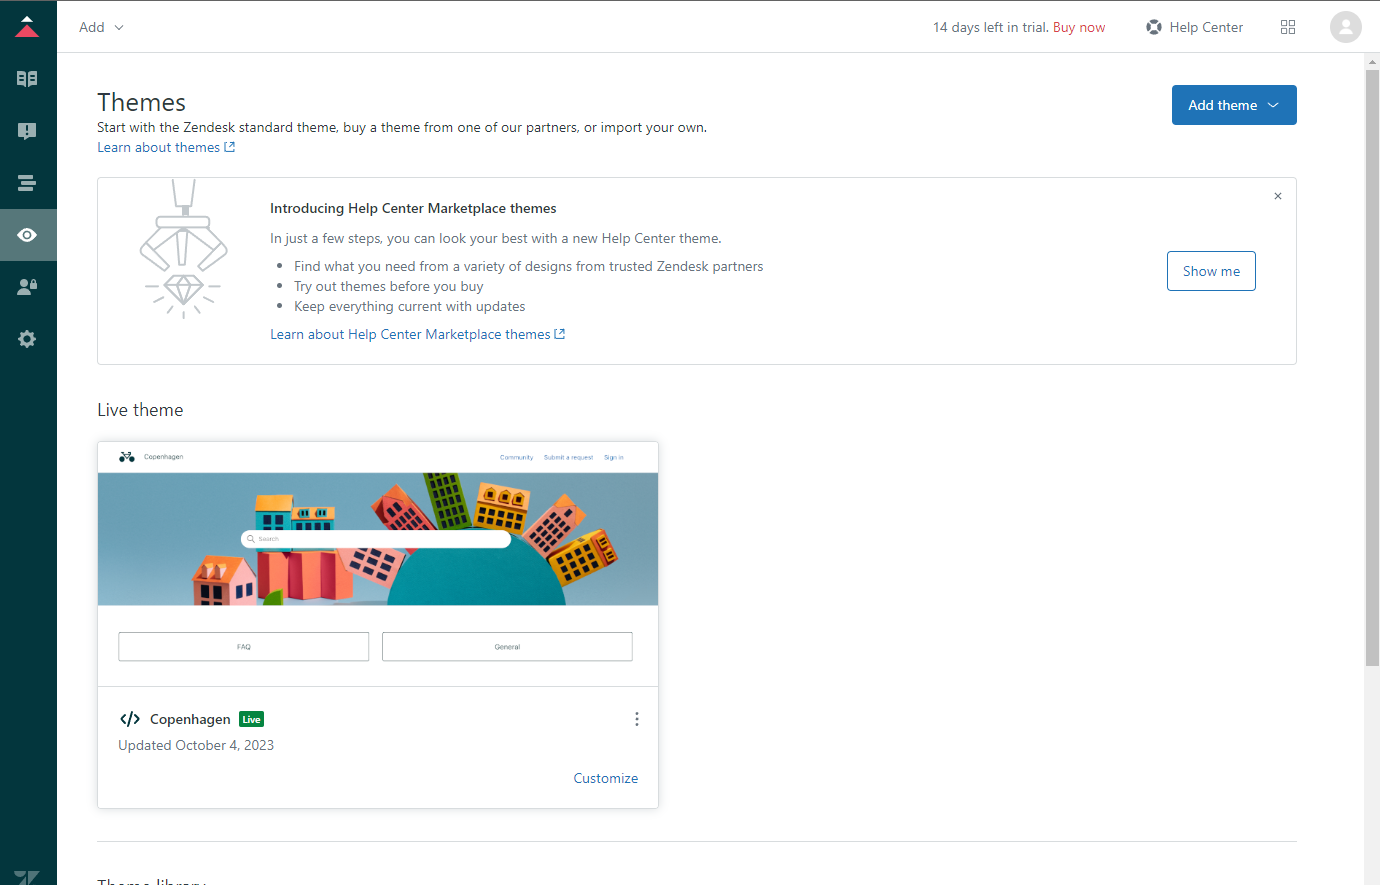
Navigate to the "Custom Design" tab. Click on the "Custom Design" button found in the sidebar, then select "Customize" to access the customization settings.
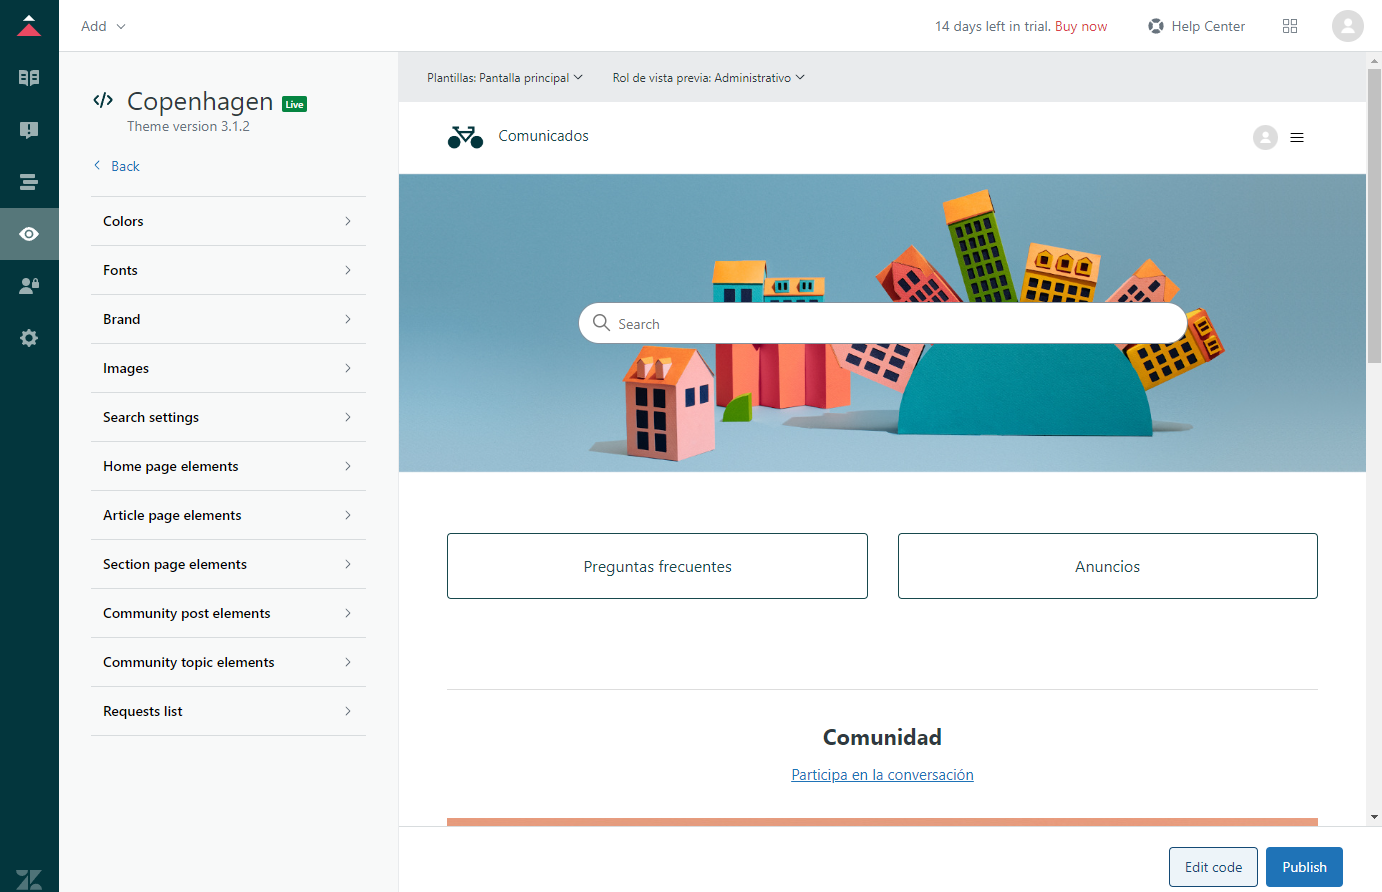
Wählen Sie aus den Anpassungsoptionen "Code bearbeiten" aus.
In the left panel, navigate to the Files section and select the "document_head.hbs" file. Paste the code snippet provided by SEATEXT AI into the designated field within the "document_head.hbs" file. Finally, click on "Publish" to apply the changes and integrate SEATEXT AI into your Zendesk platform.
Schritt 2: Fügen Sie den JavaScript-Code von Seatext auf Ihrer Website ein
Access the "Guide" section of your Zendesk dashboard. In your Zendesk dashboard, locate and click on the four small square icon, then select "Guide" from the options provided.
Sie haben SEATEXT AI nun erfolgreich mithilfe von JavaScript auf Ihrer Website installiert.
Navigate to the "Custom Design" tab. Click on the "Custom Design" button found in the sidebar, then select "Customize" to access the customization settings.
Wählen Sie aus den Anpassungsoptionen "Code bearbeiten" aus.
In the left panel, navigate to the Files section and select the "document_head.hbs" file. Paste the code snippet provided by SEATEXT AI into the designated field within the "document_head.hbs" file. Finally, click on "Publish" to apply the changes and integrate SEATEXT AI into your Zendesk platform.

SEATEXT AI mit Ihrer Website verknüpfen
2
SEATEXT AI mit Ihrer Website verknüpfen
2
a. Use the form below to add your website address in the format (www.example.com). SEATEXTURLPUSH
c. Warten Sie mindestens fünf Minuten, bis Sie den Namen Ihrer Website neben dem SEATEXT-Logo oben auf dieser Seite sehen. Dies zeigt an, dass Ihre Website verbunden ist und bereit für den nächsten Schritt ist. Wenn Sie sie nach 10 Minuten nicht oben auf der Seite sehen, wenden Sie sich bitte sofort an unser Support-Team. Dies könnte auf ein Problem bei der Installation auf Ihrer Plattform hinweisen, und Sie benötigen möglicherweise unsere Hilfe.
IMPORTANT b. Visit your website once and stay on your page for at least 40 seconds—this will activate the AI and link it to your account.
a. Use the form below to add your website address in the format (www.example.com). SEATEXTURLPUSH
IMPORTANT b. Visit your website once and stay on your page for at least 40 seconds—this will activate the AI and link it to your account.
c. Warten Sie mindestens fünf Minuten, bis Sie den Namen Ihrer Website neben dem SEATEXT-Logo oben auf dieser Seite sehen. Dies zeigt an, dass Ihre Website verbunden ist und bereit für den nächsten Schritt ist. Wenn Sie sie nach 10 Minuten nicht oben auf der Seite sehen, wenden Sie sich bitte sofort an unser Support-Team. Dies könnte auf ein Problem bei der Installation auf Ihrer Plattform hinweisen, und Sie benötigen möglicherweise unsere Hilfe.
KI aktivieren
3
KI aktivieren
3
Proceed to the Main AI Hub to activate the necessary AI on your preferred pages. Click on "Configuration" to adjust the AI parameters. Optional Editing: SEATEXT AI provides your initial round of automatic translations and variants for testing. Log in to your SEATEXT AI account, navigate to "Variants Edit" in the left panel, and select the URL and language you wish to edit. Here, you can review, create, or manually edit translations for your variants.
Proceed to the Main AI Hub to activate the necessary AI on your preferred pages. Click on "Configuration" to adjust the AI parameters. Optional Editing: SEATEXT AI provides your initial round of automatic translations and variants for testing. Log in to your SEATEXT AI account, navigate to "Variants Edit" in the left panel, and select the URL and language you wish to edit. Here, you can review, create, or manually edit translations for your variants.