Shopify Integration
سیټکسټ (Seatext) په خپله وېبپاڼه کې نصب کړئ لاندې لارښوونو په تعقیبولو سره. د نصبولو پروسه خوندي ده، او AI تر هغو چې فعال نه وي، غیر فعال پاتې کیږي، چې ستاسو د وېبپاڼې د منځپانګې بشپړتیا تضمینوي. مخکې له دې چې تاسو سکریپټ نصب کړئ، تاسو ته د SEATEXT AI حساب ته اړتیا ده. که تاسو لا تر اوسه حساب نلرئ، تاسو کولی شئ دلته یو جوړ کړئ
Shopify Integration
ګام په ګام ادغام
د SEATEXT AI څخه د جاوا سکرېپټ کوډ کاپي کړئ چې لاندې په دې برخه کې ښکاري.
SEATEXTCODEINTEGRATION
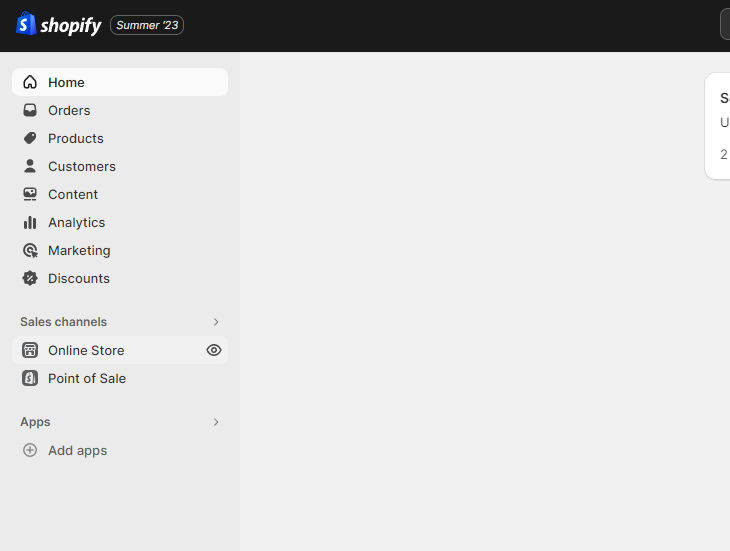
Access your Shopify account and navigate to the “Online Store” section. From there, select “Themes”.
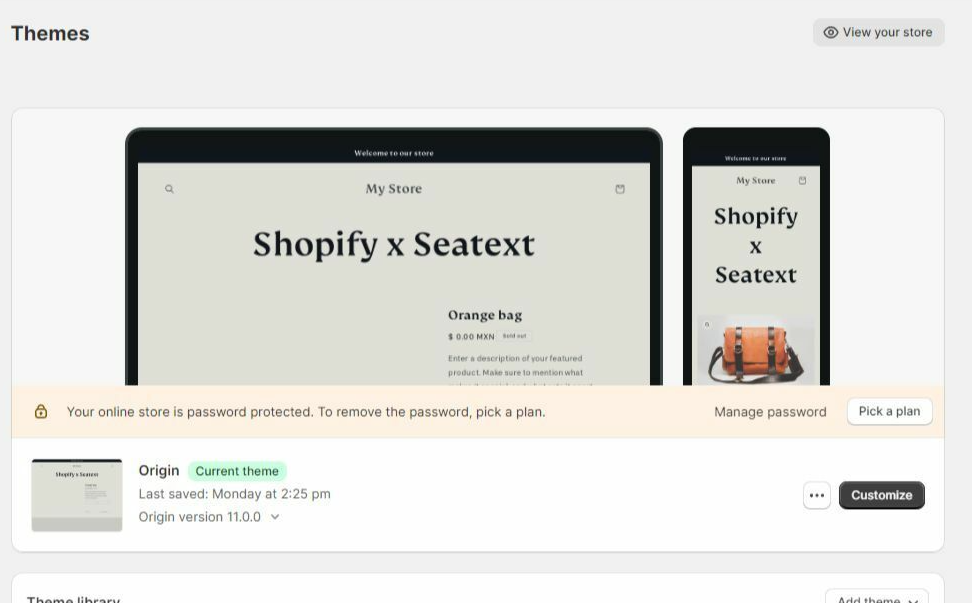
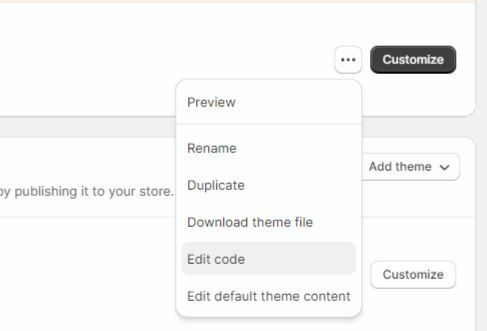
Within the Themes section, locate the theme you wish to translate. Click on the three dots icon located next to the desired theme and select “Edit code”.
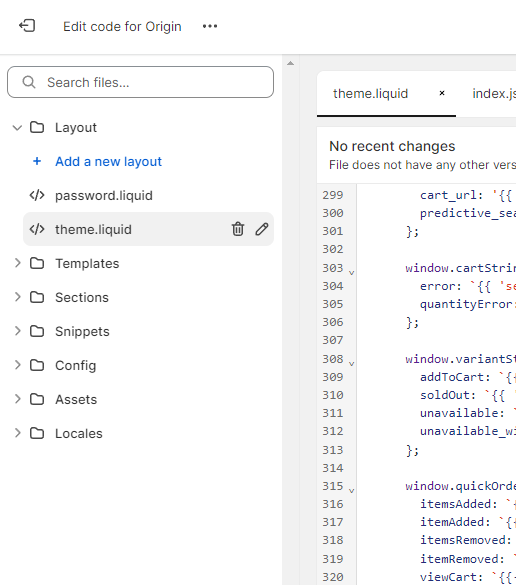
On the Edit Code page, you will be presented with a list of files on the left side of the screen. Navigate to the “Layout” folder and locate the file named “theme.liquid”.
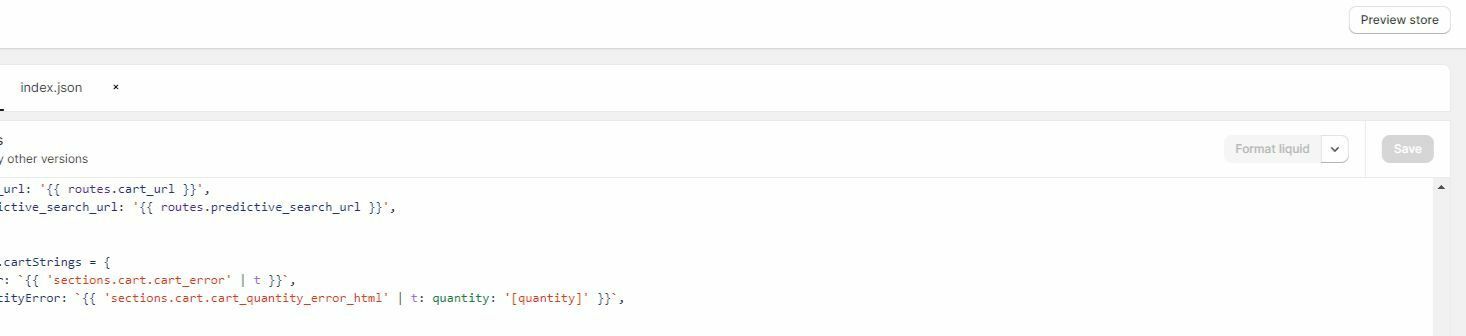
Within the theme.liquid file, scroll down to the bottom of the code. Here, you will find the closing </body> tag. Paste the JavaScript code snippet provided by SEATEXT AI directly above the closing </body> tag.


Once the code snippet has been successfully pasted, click on the “Save” button to preserve your changes.
ډیری ډومینونه: که تاسو اړتیا لرئ چې SEATEXT AI په ډیری ډومینونو کې وکاروئ (لکه د پراختیا ډومین او د تولید ډومین)، باید د هر ډومین لپاره جلا حساب جوړ کړئ. هر SEATEXT AI حساب یو واحد اصلي URL سره تړل شوی دی. محدودیتونه او امنیت: د پراختیا URLونه، لکه localhost، د امنیتي دلایلو له امله محدود دي. ډاډ ترلاسه کړئ چې د دې قضیو لپاره یو باوري، اصلي ډومین وکاروئ. متحرک پراختیا ډومینونه ممکن په سمه توګه کار ونه کړي، ځکه SEATEXT AI ممکن ونشي کولی چې ستاسو حساب سره ټرافیک په باوري توګه وصل کړي. د SEATEXT AI په ډیری ویبپاڼو کې کارولو لپاره، د هرې ویبپاڼې لپاره یو حساب جوړ کړئ.
مهم: خپله وېبپاڼه څو ځله وګورئ یا یې تازه کړئ او لږ تر لږه ۴۰ ثانیې په خپله پاڼه کې پاتې شئ — دا به AI فعاله کړي او ستاسو حساب سره یې ونښلوي.
مهم: لږ تر لږه پنځه دقیقې انتظار وکړئ تر هغو چې ستاسو د ویبپاڼې نوم د دې پاڼې په سر کې د SEATEXT لوگو سره ښکاره شي. دا ښیي چې ستاسو ویبپاڼه وصل شوې ده او د بل ګام لپاره چمتو ده. که له ۱۰ دقیقو وروسته یې په سر کې ونه وینئ، مهرباني وکړئ سمدستي زموږ د ملاتړ ټیم سره اړیکه ونیسئ. دا کېدای شي د ستاسو په پلیټ فارم کې د نصبولو ستونزه ښیي او تاسو ته زموږ مرستې ته اړتیا وي.
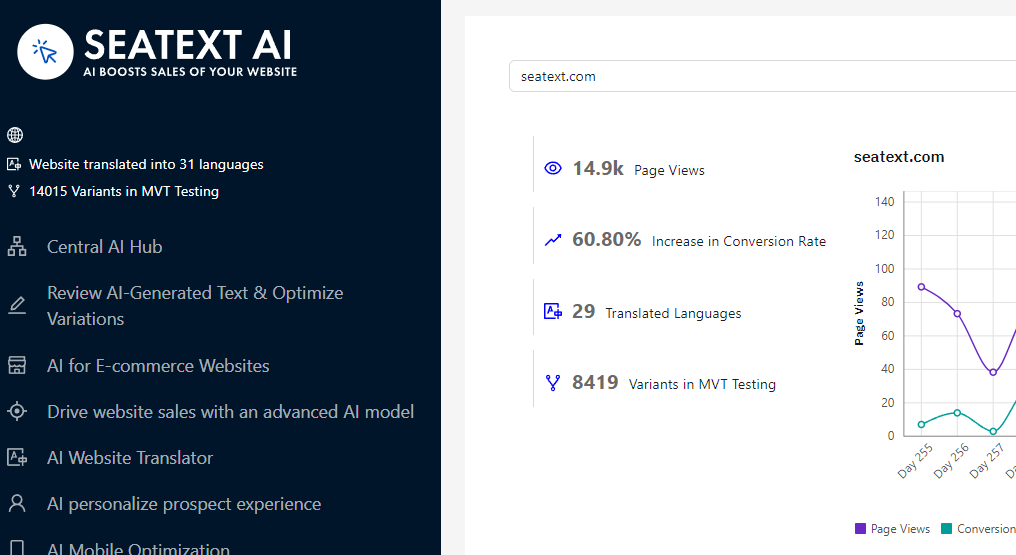
د AI فعالول: اصلي AI Hub ته لاړ شئ تر څو په خپلو غوره شویو پاڼو کې اړین AI فعال کړئ. د AI پیرامترونو تنظیمولو لپاره په "Configuration" کلیک وکړئ. اختیاري سمون: SEATEXT AI ستاسو د ازموینې لپاره د اتوماتیک ژباړو او ډولونو لومړۍ دوره برابروي. خپل SEATEXT AI حساب ته ننوځئ، په کیڼ پینل کې "Variants Edit" ته لاړ شئ، او هغه URL او ژبه وټاکئ چې غواړئ یې سم کړئ. دلته تاسو کولی شئ د خپلو ډولونو ژباړې وګورئ، جوړې کړئ یا لاسي سم کړئ.
Implement the seatextonly Tag in Your Product Descriptions To optimize your product descriptions effectively, please follow these steps: Step 1: Access Your Shopify Theme Code Log in to your Shopify admin and navigate to Online Store > Themes . Click on Actions > Edit Code for your active theme. Step 2: Locate the Product Template Identify the file that renders the product description (typically named product.liquid or located within product-template.liquid ). Step 3: Wrap the Product Description Find the product description output code, which usually appears as:
{{ product.description }}
Modify this code to wrap it in a <div> with the data-seatextonly attribute as follows:
<div data-seatextonly> {{ product.description | raw }} </div>
Step 4: Test Your Changes Save your changes and preview a product page to ensure the description is displayed correctly. Verify that the data-seatextonly attribute is present in the HTML source (you can inspect this using your browser’s developer tools). For additional details, please refer to our documentation here: https://seatext.com/documentation-ai-scope
